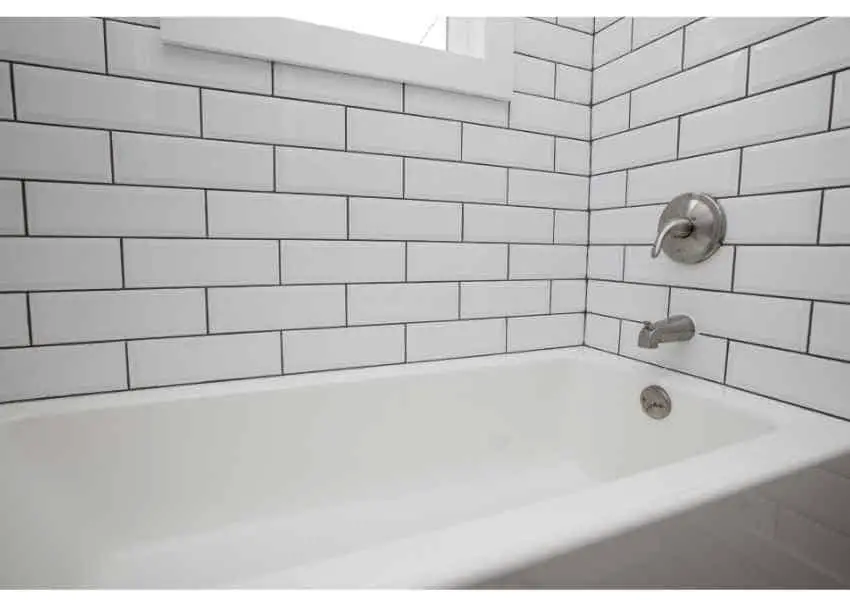
Are you tired of your old, boring bathtub and looking for a unique and stylish update? One option you may want to consider is making a bathtub out of tile. This can be a fun and rewarding DIY project that allows you to customize the design and style of your bathtub to your liking. Plus, tiled bathtubs are known for their durability and longevity, making them a smart investment for your home.
In this post, we’ll walk you through the steps involved in making a tiled bathtub, from gathering materials to adding finishing touches. By the end, you’ll have a good understanding of what’s involved and whether this project is right for you.
Materials Needed
Before you get started on your tiled bathtub, it’s important to gather all the necessary materials. This will ensure that you have everything you need on hand and can work efficiently without having to stop and go out for supplies.
Here’s a list of the materials you’ll need:
Tiles: The most important material you’ll need, of course, is tile. Choose tiles that match your desired style and color scheme, and consider the size and shape of the tiles as well. For a bathtub, you’ll want tiles that are durable and resistant to water and moisture. Some good options include ceramic, porcelain, or stone tiles.
Adhesive: To adhere the tiles to the surface of the bathtub, you’ll need a strong and waterproof adhesive. Make sure to choose an adhesive that is specifically designed for use in wet areas, such as a ceramic tile adhesive.
Grout: After you’ve applied the adhesive and placed the tiles, you’ll need grout to fill in the gaps between the tiles. Grout helps to seal the tiles and prevent water from seeping through. Choose a grout color that matches or complements your tiles.
Tools: You’ll need a few basic tools to help you install the tiles, including a tile cutter, trowel, and grout float. You may also want to have a wet saw on hand if you need to cut the tiles to fit around curves or corners.
Other supplies: Depending on the specifics of your project, you may need other supplies such as a waterproof membrane, a base for the tiles, and a drain. Make sure to have these on hand before you begin.
Preparation
Before you start installing the tiles, it’s important to prepare the area where the tiled bathtub will be installed. This will help ensure that the finished product is strong and durable and that you don’t run into any problems down the line.
Here are the steps you’ll need to follow:
- Clean and repair the surface: Start by thoroughly cleaning the surface of the bathtub. Remove any dirt, grime, or debris that may be present. If the surface has any cracks, chips, or other imperfections, repair them using a suitable repair material.
- Install a waterproof membrane: Next, you’ll want to install a waterproof membrane to protect the underlying surface from water damage. This is especially important if you’re installing the tiles over an existing bathtub. Follow the manufacturer’s instructions for installing the membrane, and make sure it covers the entire surface of the bathtub.
- Attach a base for the tiles: If you’re installing the tiles over an existing bathtub, you may want to attach a base for the tiles to ensure that they are properly supported. This can be done using a cement board or another suitable material. Follow the manufacturer’s instructions for attaching the base and make sure it is level and secure.
Installing the Tiles
Now that you’ve prepared the surface and gathered all the necessary materials, it’s time to start installing the tiles. This can be a time-consuming process, but with a bit of patience and attention to detail, you’ll be able to create a beautiful and durable tiled bathtub.
Here are the steps you’ll need to follow:
- Measure and mark the area: Before you start installing the tiles, measure the area where the bathtub will be and mark it off with a pencil or chalk. This will help you get a sense of the size and shape of the bathtub and ensure that you have enough tiles to cover the surface.
- Cut and shape the tiles: Depending on the size and shape of the bathtub, you may need to cut and shape the tiles to fit around curves or corners. Use a tile cutter or wet saw to carefully cut the tiles to the desired size and shape.
- Apply the adhesive: Once you have all the tiles cut and shaped, it’s time to start applying the adhesive. Use a trowel to spread the adhesive evenly over the surface of the bathtub, making sure to cover the entire area. Be sure to follow the manufacturer’s instructions for the adhesive, as the application process may vary depending on the type of adhesive you are using.
- Place the tiles: Once the adhesive is applied, it’s time to start placing the tiles. Begin at the center of the bathtub and work your way outwards, placing each tile carefully and making sure it is level and secure. Use spacers to ensure that the tiles are spaced evenly and that the grout lines are consistent.
- Grout the tiles: After all the tiles are in place, it’s time to grout them. Mix the grout according to the manufacturer’s instructions and use a grout float to spread it evenly between the tiles. Make sure to fill in all the gaps and smooth out the grout to create a seamless finish.
Finishing Touches:
Once you’ve installed the tiles and grouted them, your tiled bathtub is almost complete. There are a few final touches you’ll need to take care of to ensure that the finished product is strong, durable, and looks its best.
Here are some things to consider:
Install a drain: If you haven’t already installed a drain, now is the time to do it. When installing the drain, make sure to follow the instructions from the manufacturer and make sure it is properly sealed so it doesn’t leak.
Add decorative accents: If you want to give your tiled bathtub a bit of extra personality, consider adding decorative accents such as mosaic tiles or decorative trim. This can help make the bathtub feel more unique and give it a touch of character.
Seal the tiles: To protect the tiles from moisture and wear, it’s a good idea to seal them with a high-quality sealer. This will help prevent staining and make it easier to clean the tiles. Follow the manufacturer’s instructions for applying the sealer, and make sure to give it enough time to dry before using the bathtub.
Conclusion
Making a bathtub out of tiles can be a fun and rewarding DIY project that allows you to customise the design and style of your bathtub to your liking. By following the steps outlined in this post and using high-quality materials, you can create a strong, durable, and stylish tiled bathtub that will last for years to come.